Wednesday, December 1, 2010

Rollover Button


What I did for this assignment is I created the yellow square first. Then I created a orange square with round sides. That was intented to be the rollover image. A rollover image is when you have a button and you roll over it with the mouse and I changes color or shape or size. After you click it, it takes you to another URL. Thats the function of these to squares.

Friday, November 19, 2010

Website; pages

This is my homepage. I chose my homepage to be like this for several reasons. I placed the picture of the iphone. Then i put my name with a soccer ball and money because that is what i like.

Tuesday, November 9, 2010

Photoshop: Montage


These three images are the three original images used to create the final image.


In step one I changed the image size of my picture.
Then I used the magnetic lasso tool gto cut my face out and place it on the body of the astronaut. Then I placed the picture of the alien on the picture of the astronaut. I added a layer mask and used paintbrush to erase unwanted edges. I created a text saying alien words. Thats how I created this.

Tuesday, November 2, 2010

Photoshop Tennis: Monkey


This was the oringinal image.


Step 1: I Placed the monkey on a picture of outer space.
I also placed a women on a rocket ship there.
-Jeffrey worked


Step 2: In this step Ryan placed a picture of Jesus
on the top right.
-Ryan Worked


Step 3: In this step Gabby added a filter to the image.
She also put a banana in the monkeys mouth.
-Gabriela worked


Step 4: In this step what i did was I added the Moon and a few planets.

Thursday, October 28, 2010

Photoshop: Layer mask


What i did for this image is i looked for two different images on the internet. I opened them and then I used the move tool to move the dinosaur image on the other image. I then used the paintbrush tool to erase some of the dinosaur image.

Photoshop: Feathered edges


What I did for this assignment was I first looked for a picture on the internet. Then i opened it. I created a backround i wanted it to fade into. I used the magnetic lasso tool to trace around it. I went to select and clicked inverse. Afterwards I clicked cut.

Wednesday, October 13, 2010

Illustrator: Flyer


For this project what I did was I created a flyer advertising an event. The event was the school's hallways being created into haunted hallways. I used Contrast, by using completely different colors near eachother. I also used Repetition when i created the stars. I also used unity with the stars.

The skills i was taught and and used was text on a path. I used text on a path to Create the title of the event. I also used it to create the Catch phrase of the event. I combined shapes to create the ghost.

Wednesday, September 29, 2010

Illustrator:Text on Path Multimedia Design


What i did for this assignment was I first clicked on the arc tool. Drew the arc, and clicked on the type tool. Afterwards I clicked on the Arc Using the type tool. I typed Multimedia Design and changed the font and also the size.

Illustrator: Shapes

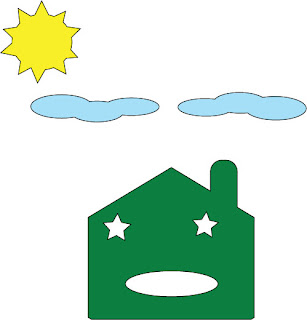
What I first did was I created a series of shapes and with the pathfinder tool I either added to shape area or subtracted from the shape area. For example the sun I Created a few stars rotated them and Added to shape area.

Illustrator:Text on Path Name


What i first did was i clicked on the arc tool and placed the arc on the blank document. The i created a text with my name on it placede on top of the arc I drew. After that i chaged the font.

Illustrator: Clipping Mask

In order to do this assignment i first went on the internet, and searched up a picture that matched the word i chose whih was ocean. I placed the picture on illustrator. On top of that I created a text that said ocean. I selected both objects. Then i went on object and then clipping mask and last i clicked make.

Tuesday, September 28, 2010

Illustrator:Snowflake


To make a snowflake what i first did was clicked on the polygon tool. Created two hexagons, in different positions over eachother. I selected both objects and on the pathfinder i clicked "add to shape area". Afterwards i clicked on the rectangle tool created six rectangles about the same size one by one i placed them on the two hexagons i had joined before. When i placed the rectangles over the two hexagons i clicked "subtract from area" on the pathfinder. Thats how i created the snowflake.

Illustrator: Clipping Mask name


To start this assignment i first went on the internet and looked up a picture of a soccer ball. I found the picture that would look best with my name over it. I created a text with my name and placed it over the picture of the soccer ball. Afterwards I Selected both objects and went to File, Save web for devices and pressed save.

Friday, September 24, 2010

Welcome

Hi! My name is Jeffrey Martinez and I will be using this blog as a portfolio for my multimedia design class. I will be posting my projects and exaples along with a brief description of what I did. Please check back to see my work!